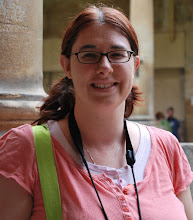
Emilie Ahern is the Communications Director for Tinkering Ink and our Guest Host for this challenge!
From Emilie :
I love the look of brads or bling in a perfect shape to highlight a photo or journaling. I used to use a pencil to try to draw lines and then erase them. Until one horrible day when I finished my entire layout and the pencil mark would not erase. Then I had a light bulb moment. Simply draw, trace or print the desired shape onto a scrap of lightweight vellum. Then cut around the shape and lay it on your layout. Then place the bling or punch holes for brads (I have also stamped) along the edge of the shape. Using vellum means you can see exactly where you are lining up the brads. You can even save you vellum "templates" for future use. Try doing heart shapes on your upcoming Valentines layout or card.
Emilie's Challenge: use brads or bling to create a shape. It can be a circle, heart, star, wave ...anything!
And Tinkering Ink has generously donated a RAK for one lucky winner -- a full set of their new Valentine's line called Beloved as well as every single set of their new rub-ons!
 Emilie's layouts: Emilie sent us two for the challenge! She used Tinkering Ink's Beloved collection for the first one, and added bling in a circle on both of them.

 Here's what the Playground girls came up with:

 Becky used Cloud 9 Design's Raindrops to make flourishes on her layout. You can see a close-up of her flourishes to the left.
 Alicia made the butterfly trail by lightly sketching with the design in pencil then filling it in with black brads.
 Deborah used a Heidi Swapp Silhouette shape that had a dotted edge on her layout, adhering crystals over the dots.
So, don't put away that bling yet -- post your creations to this thread by Sunday night, January 27th to be eligible to win the RAK for this challenge.
From Emilie :
I love the look of brads or bling in a perfect shape to highlight a photo or journaling. I used to use a pencil to try to draw lines and then erase them. Until one horrible day when I finished my entire layout and the pencil mark would not erase. Then I had a light bulb moment. Simply draw, trace or print the desired shape onto a scrap of lightweight vellum. Then cut around the shape and lay it on your layout. Then place the bling or punch holes for brads (I have also stamped) along the edge of the shape. Using vellum means you can see exactly where you are lining up the brads. You can even save you vellum "templates" for future use. Try doing heart shapes on your upcoming Valentines layout or card.
Emilie's Challenge: use brads or bling to create a shape. It can be a circle, heart, star, wave ...anything!
And Tinkering Ink has generously donated a RAK for one lucky winner -- a full set of their new Valentine's line called Beloved as well as every single set of their new rub-ons!
 Emilie's layouts: Emilie sent us two for the challenge! She used Tinkering Ink's Beloved collection for the first one, and added bling in a circle on both of them.
 Here's what the Playground girls came up with:
 Becky used Cloud 9 Design's Raindrops to make flourishes on her layout. You can see a close-up of her flourishes to the left.
 Alicia made the butterfly trail by lightly sketching with the design in pencil then filling it in with black brads.
 Deborah used a Heidi Swapp Silhouette shape that had a dotted edge on her layout, adhering crystals over the dots.
So, don't put away that bling yet -- post your creations to this thread by Sunday night, January 27th to be eligible to win the RAK for this challenge.