Tuesday, December 14, 2010

Tim Inspired!

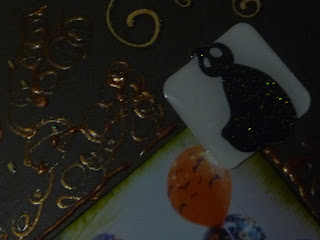
Here are the 2 tags I've made so far.

Tag #1: Inspired by the design of Day 6. The only Tim Holtz product on this tag is the little tag...
Proving you don't have to go out and buy a bunch of stuff to make a tag like his!
Just do your own thing. :)

Tag #2: Inspired by Day 7.
I made the poinsettia out of sticky backed canvas, but I drew & hand cut my flowers myself.
The background was stamped with a scarlet lime stamp. The letters were Hiedi Swapp letters covered with Tattered Angels Glimmer Glam. I did stamp them with script like Tim, but the paint covered it up.
I think I'll be making a few more them. They are quite time consuming but they come out lovely!

Monday, December 13, 2010

More Tags!

Tim's 12 Tags were all posted yesterday, with two bonus ones on the 12th. Did you see them all?


You still have plenty of time to enter for our Tim Holtz RAKs.

And here's a couple I finished this weekend. Tag 10 using plastic from packing - simply ingenious and it works so well. Honestly it's my favorite tag of those I've made (so far). The pictures just don't do this technique justice. I've going to be on the lookout for packing I can reuse come Christmas morning!


Remember, you have until December 21st to post your project(s) here.

Wednesday, December 8, 2010

Quick Christmas Tags


Aren't these cute? Ali Edwards did a few quick and easy tags for the 20 Days of Holiday Sharing at Two Peas. Here's a link to her blog with instructions. All you need are tags, random chipboard letters, scrap paper and your favorite mist.

Tuesday, December 7, 2010

December Challenge - Tags!


December is well upon us and everyone is busy running around trying to find the perfect present, baking cookies, or like me searching for that new Tim Holtz die. Everyone's getting busy and starting to feel overwhelmed. So, we're going to do something different this month and have a monthly challenge based on Tim Holtz's 12 Tags of Christmas.

Tim's tags is something I look forward to every year. They seem to get better and better and really open your eyes to how to use products. Tim posts a tag a day from December 1st through December 12th. He's done some truly beautiful tags this year.

Your challenge: use one of Tim's tags as inspiration to create your own tag, card or layout.

And you have all month to do this. Right through to December 31st. We'll be doing a random drawing at the end of the month for RAKs - yes that's plural - and I've got some wonderful Tim Holtz product to send out.

You can make multiple items for this - as many times as you like. Just leave us a separate comment linking us to your creation. Let us know which tag inspired you and which technique(s) you did. Each comment you leave gets you an extra chance to win.

Here are a few completed tags I've done. Look for posts from our team members as they share their projects.

Tag #3 - Tissue tape flowers. Who'd thought? They are quick to make and just gorgeous. I think they'd be beautiful with inked edges, as well. Or sprayed with glimmer mist.


Tag #4 - I used sticky backed canvas for this one.


Tag #5 - embossing metal is fun. But watch your hands! It does get hot. I didn't have white UTEE so I experimented. I used white paint with clear UTEE. That didn't get me the look I wanted, so I heated up the UTEE and added a thick layer of white embossing powder. Bingo!

So get out your heat guns, distress ink, and tags!

Saturday, November 6, 2010

Chipboard Winner

Gracie Ann Tan!

What a gorgeous LO! Love the way you altered those letters!
Email me at (lostinadreamofjosh@gmail.com) and I'll get your chipboard prize out this week. :)

~Kimmy

gotcha

Monday, October 25, 2010

Challenge 73 - Glow in the Dark!

Halloween is just around the corner and for this challenge we're getting spooky. I've seen lots of fun Halloween embellies, papers and accents, but the thing that really caught my eye this year is the glow-in-the-dark products. Martha Stewart has glow-in-the-dark glitter. So does ModPodge.

So your challenge is to use a glow-in-the-dark product. Any kind, any way you want. And please, let us know what & how you used it.

Post your layout by Sunday night, November 7th to be considered for a RAK.

Yes, it does glow, although it's a bit hard to photograph....

Here's what the team did --


Deborah
I used Martha Stewart's glitter in two places - the chipboard swirl and a rub-on "stickez" product by Studio G. Here's the chipboard glowing in the dark:


For my project I used Glow in the Dark Paint by DecoArt. I painted all the little stars on the patterned background paper with it, and then the corrugated letter P.

Very hard to photograph, but you get the idea.


Photojojo has a cool tutorial for making your PHOTOS glow in the dark!

Miwako:
I use ModPodge on canvas sticker (Little Yellow Bicycle) and all other steckers in my LO(epoxy stickers: LYB, pop-up stickers: Melange Creative Imaginations)  itself are the glow-in-the-dark products. Those are not newest but I love it stil now. The title is Fancy Pants glitter cut,too.
Also, I use Dimentional fabric paint (bronze metallic color) of the doodle .

Monday, October 11, 2010

Challenge #72 - Chipboard

After a month's hiatus we're back and ready to go!

For this challenge take some of that chipboard in your stash and alter it!
The prize for this challenge will be an assortment of chipboard goodies!


Kimmy

I altered my letters by covering them with Gesso and then sprinkling embossing powder on the wet paint. I didn't heat the embossing powder. For the border piece I glimmer misted, stamped & embossed, and added some clear crackle paint.

Deborah

I used a piece of grungeboard that had been embossed using a Tim Holtz alterations die, then stamped and heat embossed, then painted over with acrylic paint. Once the paint was tacky I wiped the piece with a slightly damp paper towel to remove paint from the heat embossed image.

Miwako

I use white chipboard alphabet for this title which was aleterd by my handwriting. Other printed chipboad of Fancy pants is so cute.


Helga


I used an assortment of chipboards in this layout. Some chipboards were just simply inked around the edges and some were painted then inked and then applied Glossy Accents.

Monday, August 30, 2010

Challenge #71- Vegetal Layout

Whew!  Summer is winding down, kiddos are returning to school, and life is getting back into a rhythm.  And we here at Method Playground are resuming our challenges.

This week we challenge you to use some kind of vegetation on your project.  It can be florals, leaves, grass, dried, silk, paper.  Whatever you chose, but we want to see your layouts in full bloom!  Here are some inspiring pages from the design team:


Kimmy: I went with a garden theme. My picture looks like it was taken in an enchanted garden... so I enhanced it with misting over some real tree branches/leaves for my background. I also used a bamboo transparency & some fake flowers & leaves. I added some butterflies and misted dragonflies to enhance the garden theme. :)

Deborah: I also misted over real leaves and branches to make my background. I also used top of a parsley branch that had gone to flower to paint on top of my misted background. I ended up not using flowers, but little shells as accents.

Miwako: I love this stitched paper by Prima. I cut out the sides of paper. My twins played flower petals in the flower garden. The petals looked like dancing with them. I separated the pearl swirls because I want to feel moving on my layout.
Helga: Here is a simple layout I did using dried plants by PRIMA.
Michelle: These photos are of a favorite outdoor spot.  The garden pictures went perfectly with this challenge.  I created these flowers using the Tim Holtz Tattered Florals Sizzix die.  Please visit my blog later in the week for a tutorial.

Monday, July 26, 2010

White Doily

Simply White
The challenge for the next two weeks is for you to create a WHITE LAYOUT...meaning your layout should be all white. Beige and off-white is allowed and we will also allow you to use one other color but please use it minimally. Another requirement is that you should use a doily on your layout. Here are samples made by our very talented design team.


Helga- This is a layout that I enjoyed making. It is the first time I used an all white layout. I never expected that it would turn out so attractive.


Amanda - I kept it simple with a distressed cream/white/gray background and collage and metal elements.


Kimmy~ I couldn't find a traditional paper or crocheted doily, so I used a Basic Grey scrapbook "doily" which I cut into a more traditional doily shape.I layered transparency & embossed paper inked with silver over it...love the subtle but classy effect of the white letters on white. I created the flowers from a ruffled fabric ribbon which I gathered.

Michelle:  This challenge took the guess work out of the color scheme. And being restricted to one color made the paper choices easy!  I created a mat out of a cluster of paper doilies.  I used corsage pins to tack the trim into a ruffle, and more trim to create a flower.  The frame of buttons completes the vintage feel of this LO.


Friday, July 23, 2010

Challenge #68 : Slideshow & Winner !

So sory for waiting to announce the winner and thank you for join my challenge. After much delay, here's the slideshow and winner.


The winner is........................................................

Davi !!!

It's very difficult for me to pick one because all cards and layouts is beautiful were so creative and beautiful. I love davi's choice the color, ribon and  all things. Davi, please let me know your address and I'll send the RAK for you.

Miwako

Sunday, July 18, 2010

Challenge 70 - Slideshow and Winners

Thanks to everyone for their patience. After much delay, here's the slideshow and winner for our border challenge. I found that iPads are great for some things while on vacation, and blogging just wasn't one of them.

As usual, everyone's layouts were so creative and beautiful, it was hard to pick a winner. And the RAK goes to ...

Issa Virtucio-Lucido !!!

Please send us you addy so I can get your Die-namics dies out to you.

Monday, July 5, 2010

Challenge #72 - Reflection (7/5/10)

I challenge you to use a reflective surface on your layout, card, or project. For example, you could incorporate Heidi Swapp's shaped mirrors (birds, hearts, etc.), small mosaic mirrors from craft stores, mirrored cardstock, old sunglass lenses, etc. or make your own surface from aluminum foil. The challenge is to use the reflective surface creatively and effectively to tell your story (and to photograph the finished page effectively!).


Kimmy:
I used reflective tape (which I embossed) metallic silver paper, a metallic silver overlay, a metallic butterfly accent, & some mirrors (behind my letters, my green shirt was reflected in them when I took the photo.)


Michelle:
Loved this challenge so much I made two LO's.  For the first, I used four-plies of heavy duty aluminum foil and ran it through an embossing folder.
On this LO, I used some round little mirrors from the craft store to accent the squares of paper (geesh, it's hard to photograph mirrors!).

Monday, June 21, 2010

Challenge 69 Winner

By random drawing, the winner for the Scraplift challenge was MICA! Congrats to you - send me your address and I'll get a RAK out to you this week.

Challenge 69 Slideshow

Monday, June 14, 2010

Challenge #70 - Borders

I've never been a big punch person -- until they came out with lots of cool edge punches. It's my favorite tool these days. Edge punches are just one of many things you can use for borders. There's stickers, die cuts, and rub-ons to start. And if you have a die cut system such as a Cricuit or Cuttlebug you can get border dies as well. Tim Holtz has a new line out with Sizzix. My Favorite Things Stamps has just come out with Die-namics, a steel die that can be used in most systems. I've got a couple of these already :)

Your challenge is to use a border in your project. Any way you want. Then, post your creation here by Sunday, June 27th to be eligible for a RAK. I've got a new Die-namics die (or two) for one lucky participant. And My Favorite Things Stamps will add in one of their new sunshine die cuts!

According to their website, the Die-namics dies will not only cut through paper, but thin chipboard, cork, felt, bubble wrap, acetate, sticky-backed canvas and more.

Here's what our team did:


Deborah -


Amanda -

I tried to use borders in several ways. First, I painted a subtle white frame around my photo. I then layered a punch out border and a border trimmed from a 12x12 sheet. I used a border punch on the quote piece to get the notebook edge. Lastly, I layered a border trimmed from a 12x12 sheet as my title.

Helga

Kimmy-
I used border paper, border stickers & border punches on my layout.

Paloma:


Michelle: